Showing posts with label cookie. Show all posts

Saturday, July 21, 2012

Coco-Raisin Chocolate Chip Cookies


Hmm.. I don't really know what to call this cookies. I made this just because I have too many raisin in my kitchen's closet. My youngest looooves raisins and sultanas, while my eldest could almost throw up if he forced to eat them.

So I was thinking how can I make something with sultana that everyone can eat it? How should I 'camouflage' it? Aha! I thought. How about chocolate chips? Their colours is about the same as raisin. But then, how could I disguise the raisins' texture? If it's in a bread or cake, my eldest might notice it. Besides, my right hand is still in injury, I think it's because handling mouse too much. It's not a joke (even though that means I was in computer too much which is might be silly), my husband said many people got hands injury when they're using computer mouse too much. So anyway, that means I can not knead bread dough. I've tried once, it made my hand more aching and my bread gone baddddd. Then I thought cookies will be saver to hide raisins.

I made the cookies based on the previous chocolate chip I made before. I substitute half of the chocolate chips with raisins, and substitute almond with coconut. Still without any synthetic food additives.

Here's the responses of my beloved little men while they were eating it:
My eldest son came to me while he was munching the cookies and said: Bunda(Mum), did you put chocolate in it?
Me: yes.
Few minutes later, my youngest chased me to the kitchen, munching cookies and said: Bunda, did you put raisin in it?
Me: yes.
Me: (silently giggled)

The point is, my husband and I always try avoiding lie to the kids. So this is not a lie, I answered every my kids' question honestly. Anything that they don't ask, I don't answer, he he.

By the way, I really don't know what to call this cookies. Sorry if the name gets too long then :)
Anyway, here's the recipe:


Coco-Raisin Chocolate Chip Cookies

Ingredients:

1 cup wholemeal wheat flour
1⁄2 cup brown sugar
1⁄4 tsp salt
1⁄3 cup oil
1 egg
1⁄4 cup chocolate chips
1/4 cup raising, diced
1/4 cup dried coconut shred

Directions:
- Mix with spoon flour, chocolate chips, raisins and coconut.
- In another bowl mix with electric mixer egg, oil, sugar and salt until thick and the consistency resemble to mayonnaise.
- Add the flour mix into the egg mix. Fold with spatula, just until all wet.
- If the dough seems too wet, put the dough in the fridge at about 15 minutes, while we heat up the oven to 170C.
- Line a cookie tin with a baking paper.
- With two teaspoons make a ball of dough and put onto the the tin. You can press the dough a little with your finger to make it wider if you like.
- Bake about 10 minutes.
- Take out from the oven and let it cool. The first time they took out from the oven they might seems a bit soft, but after cooled it will be harden a bit. It will be chewy inside and crunchy on top.

Tuesday, May 1, 2012

Almond Chocolate Chip Cookies (Dairy-free, Additives-free)


Alhamdulillah.
I'm just very happy, and relief after making these cookies.
Every time I saw cookies recipe anywhere in internet or recipe books, they always using baking soda or baking powder. It's not that all of food additives are veerrrrrryyy dangerous. I'm not a doctor, you know. I'm just a little bit suspicious with food additives. A video and an article that I found about food additives makes me more and more want to avoid them. Besides, I just want to prove that all those synthetic or maybe chemical thing(I don't know) are not necessary to use in our food. More natural food probably are better healthier food, I think.

Of course I'm not and can't always avoid those things. I'm not so uptight avoiding it. We still eat store-bought cookies, breads, crackers, etc. But, it's just makes me happier to baking and cooking naturally. I'm not too attached with such synthetic things and don't have to buy baking powder, baking soda, and all of their friends. I can safe some money, thrifty me!
It feels like..great when we can beat those mass-production food. Ha ha, okay, I'm exaggerating.
I have talked about reducing food additives before in a cooking and baking mailing list. Some of them told me not to be paranoid. Oh dear.. Is it wrong if we have our own choice of healthiness?

Anyway, I always thought, can I make chocolate cookies without any synthetic food additives? Whenever I google about it, they always say no, you can't. Only shortbread that can be make without baking soda or baking powder, they said. Well. let see about that now.

Yesterday I really want to make cookies for my sons. I remember I have chocolate chips and almonds in the kitchen. I have to make something from those almonds before they got rotten! But, oh no, I only have 1 stick of butter, while that butter I kept to make pastry for pie. So, search and search, I found some recipe that instead of using butter, they uses oil. Good. I'm safe. Besides, using oil in baking is slightly healthier than using butter, right? ;)
Then I was thinking again, if I mix the eggs and oil until resemble to mayonnaise, maybe it can substitute butter well... While on that thought, I remember how we can bake cakes without those food additives as long as we mix the eggs right. So probably... The result of my fuzzy mind was, I will mix the eggs and oil until resemble to mayonnaise, and skip out the baking soda. Here is the recipe that inspire me to make cookie with oil, but I guess I changed quite a bit in it.

How's the result then? Good. I don't know how many cookies does it makes from one recipe, because my son kept on eating it every time I took them out from the oven. So I did't really had chance counting them.

I just love it.

Almond Chocolate Chip Cookies

Ingredients:

1 cup wholemeal wheat flour
1⁄2 cup brown sugar
1⁄4 tsp salt
1⁄3 cup oil
1 egg
1⁄2 cup chocolate chips
1/4 cup whole roasted almond, crushed

Directions:
- Mix with spoon flour, chocolate chips and almonds.
- In another bowl mix with electric mixer egg, oil, sugar and salt until thick and the consistency resemble to mayonnaise.
- Add the flour mix into the egg mix. Fold with spatula, just until all wet.
- Put the dough in the fridge at about 15 minutes, while we heat up the oven to 170C.
- Line a cookie tin with a baking paper.
- With two teaspoons make a ball of dough and put onto the the tin. You can press the dough a little with your finger to make it wider if you like.
- Bake about 10 minutes.
- Take out from the oven and let it cool. The first time they took out from the oven they might seems a bit soft, but after cooled it will be harden a bit. It will be chewy inside and crunchy on top.

Enjoy :)

Friday, February 24, 2012

Oatmeal Shortbread


Small batch.
Small batch is good to test out a recipe. This one is simply easy and the result is a small batch of buttery and crunchy-inside shortbreads. It is good enough for hungry toddlers between their meal time. The sugar used is low, so for you sweet-tooth people, these might not suits your taste so much.
I got the recipe from here.
I just made a little adjustment, so you might want to compare with it's original recipe. I made the boys helped me out making it. They just dumped the ingredients into the bowl. I thought the batter could be cut with cookie cutter. But, apparently I didn't think it's firm enough for it and instead it is good enough to be flatten in the tin and cut out after bake.
So here is the recipe, my way ;)


Oatmeal Shortbread

Ingredients:
1 cup flour
3 tablespoons sugar
120 gr unsalted butter
1/3 cup quick-cooking oats
a little salt

Directions:
- Heat up the oven 165 celcius.
- Toss the heck all of ingredients into the bowl. Process it by cutting with two butter knife until mixture resembles fine crumbs.
- Mould the batter into a ball.
- Lined a tin with baking paper. I use about 23x23cm tin.
- Put the batter onto the tin. Use your finger and hand to press the batter to cover the tin's base.
- Use the butter knife to make a cutting trace on the batter'surface. If you want to cut it deep until the butter knife reach the tin's base, it's alright too.
- Bake the shortbread for about 20-30 minutes.
- Take the tin out and immediately cut the cookies carefully following the traces that you have been made in advance.
- Let it cool.
- Take the cookies out the tin. Enjoy!

Friday, January 28, 2011

Oatmeal Lace Cookies


Let the cookies crumble..hm..
Kalau ngomongin oatmeal, atau dulu sering disebut havermout, benar-benar jadi ingat waktu masih kecil. Aku sangat familiar dengan oatmeal, karena sering sekali makan oat. Dulu kami, aku dan abang-abangku, sering dibuatkan bubur oat oleh eNek(nenek). Rasanya pasti manis dan pakai susu biasa atau susu cokelat bubuk. Pilihan lainnya? Dingin atau hangat. That's it.
Tapi, aku juga ingat rasanya eNek pernah membuat kue kering dari oatmeal. Bahannya seingatku sangat mudah, tapi apa itu bahannya aku sangat-amat-lupa. Hiks!
Dari banyak resep oatmeal cookies yang kutemukan di internet, rata-rata menggunakan banyak bahan, seperti telur, bahkan baking soda dan lainnya.
Setelah berbulan-bulan lamanya berhenti mencari, aku browsing lagi untuk oatmeal cookies ini. Voila! Senangnya bisa menemukan resep ini yang bukan hanya gampang, tapi juga memerlukan sedikit sekali bahan dan cara yang super-duper mudah!
Oatmeal cookies sederhana seperti ini sering disebut Lace Cookies di luar sana. Mungkin karena tepi si cookie ini tipis dan terkesan berenda-renda.
Aku buat kue ini sesuai dengan resepnya, hanya menggunakan gula biasa dan tanpa vanilla. Memang manis. Tapi aku nggak tahu ya, apakah kalau mengurangi gulanya akan mengubah tekstur atau nggak. Mungkin bisa dicoba menggunakan 1/3 cup gula saja, atau ditambah garamnya menjadi 2 pinch (;p), atau menggunakan salted butter. I think salt could really helps.
Adonan kue ini saat mentah memang sangat crumbly alias pera. Tapi jangan takut, bentuklah sebisa mungkin sambil dipadat-padatkan sedikit. Nanti setelah matang ia tetap akan menyatu juga kok.
Ohya, nggak boleh juga lupa menceritakan aromanya, it's sooooooo buttery, emmmm!!!
Anyhoo, I just love the simplicity of it.
I ate it myself. Who care? ;p


Oatmeal Lace Cookies

Bahan:
1/2 blok mentega tawar (dari mentega batangan(yang 227gr) kupotong dua, kuambil separuhnya)
1/2 cup gula pasir
secubit garam
1 1/4 cup oatmeal (non instan)
3 sdm tepung terigu

Cara membuat:
- Panaskan oven 180C
- Campur oatmeal dan terigu di dalam mangkuk. Sisihkan.
- Cairkan mentega, gula dan garam di atas api kecil hingga mentega larut. Angkat
- Aduk campuran mentega cair ke dalam oatmeal-terigu hingga rata.
- Siapkan loyang dengan mengolesi mentega dan terigu tipis-tipis.
- Tuang satu sendok makan adonan ke atas loyang. bentuk bundar dan pipihkan dengan sendok. Beri jarak yang cukup jauh karena ia nanti akan melebar.
- Panggang sekitar 8-12 menit. Untuk awal coba panggang 8 menit dulu. Kalau kurang baru tambahkan waktunya.
- Kue sudah matang kalau tepi kue kecoklatan dan tengahnya masih tetap agak putih.
- Angkat. Biarkan sampai kue cukup dingin untuk digeser. Angkat kue dari loyang.
- Hidangkan.

*Menghasilkan 15 keping kue

Wednesday, October 27, 2010

Bangket Daun Jeruk

summer bunnies

Aku jarang banget bikin kue kering alias cookies. Bahkan di blog ini juga belum pernah ya?
Tadinya aku nggak tertarik untuk ikutan Bangket Week-nya NCC. Tapi kok, lama-lama tertarik juga ya. Pas lihat-lihat resep dari panitianya, hm.., kayaknya bisa dicoba nih. Dari beberapa resep yang diberikan, tadinya mau bikin Bangket Kacang a la mbak Nadrah aja. Setelah pikir-pikir, kayaknya kalau pakai terigu kurang 'Endonesah' yaa.. Akhirnya kuputuskan untuk pakai resep nomer 2, sumbernya dari Majalah Sedap, yaitu Bangket Jeruk Nipis. Which, I'm wondering, kan nggak ada jeruk nipisnya, kenapa namanya pakai '-Jeruk Nipis' ya?
Anyway, pas mau bikin ini terus terang aku nggak ada gambaran sama sekali Bangket itu seperti apa. Teksturnya kaya apa, rasanya kaya apa, belum terbayang. Setahuku kue Bangkit itu, menurut almarhumah nenekku adalah kue kering asli Betawi. Tapi menurut ibu-ibu di NCC, Bangket itu kuenya orang Sumatera. Seingatku juga, Bangket kuenya tebal berwarna cokelat dan berempah. Kalau nggak salah, kue ini juga bukan kue yang lumer di mulut seperti -katanya- Bangket Susunya mbak Nadrah.
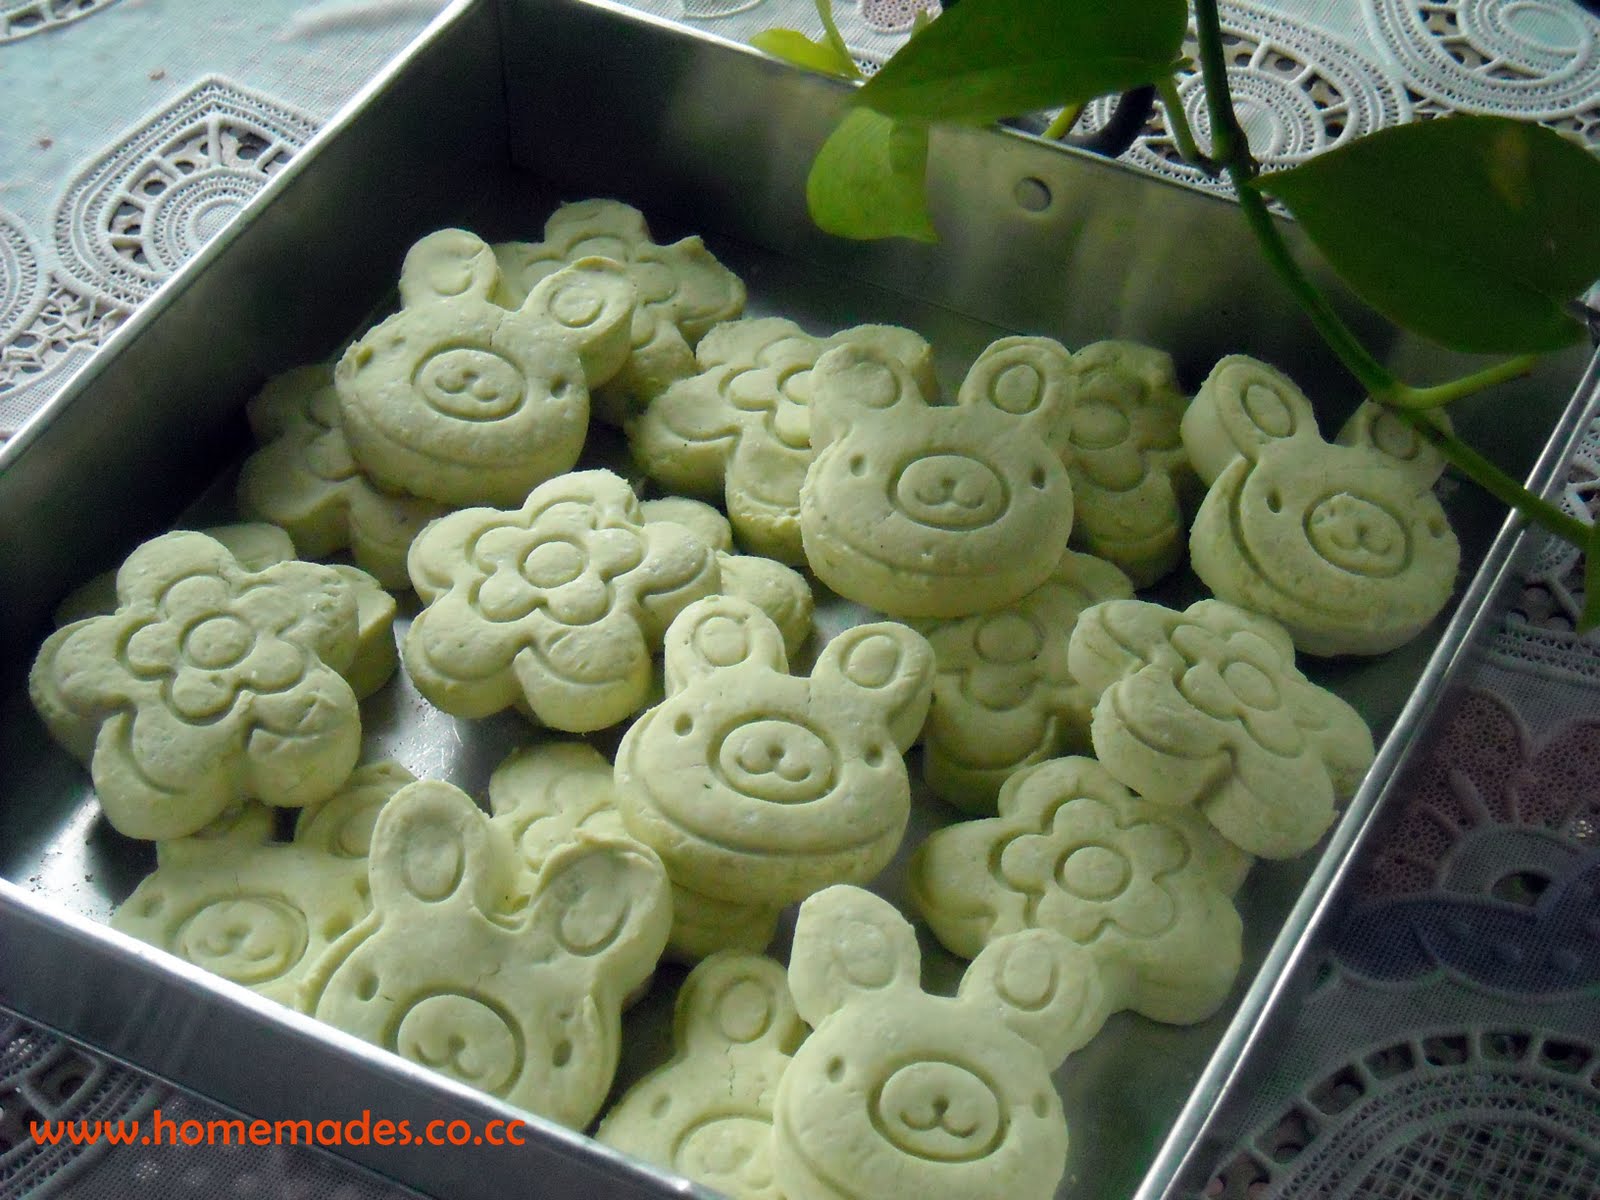
Karena sudah banyak yang membuat Bangket Susu, maka aku tertarik untuk membuat bangket yang lain. Tercetus ide untuk mewarnai bangket ini dengan Suji. Sayangnya, sepertinya aku memakai sujinya kurang banyak. Hasil kuenya berwarna hijau pucat, yang yah... nggak apa-apa juga. Cantik-cantik aja menurutku. Tapi mungkin lain kali aku memakai lebih banyak daun suji, mungkin sekitar 12-15 lembar.
Sekarang cetaknya pakai apa ya? Tadinya sih, terpikir untuk dicetak tangan aja. Tiba-tiba ingat cetakan Bento dari temanku Fitri. Maka kupakailah cetakan berbentuk bunga dan muka kelinci. Tadinya mau pakai cetakan beruang juga, tapi sepertinya tangan dan kakinya yang kecil akan menyulitkanku mengeluarkan adonan. Jadi, maaf Pak beruang. Lalu baru sadar, di mana ya rollingpin? Ah, ambil saja botol sirup yang kosong sebagai rollingpin! my messy workplace

Pertama kucoba bakar 30 menit, udah enak, tapi tengahnya masih belum kering benar. Pas coba 50 menit, duh kayanya kekerasan jadinya. Nah, kalau yang 40 menit cukup deh, luarnya garing, dalamnya lumayan empuk. Rasa kue ini kayanya seperti kue sagu ya? Cuma kalau kue sagu keju itu gampang ngeprul, kalau ini cukup kokoh. Kue apa ya jaman dulu yang kaya gini, hmm? Walaupun nggak pakai kulit jeruk, tapi aroma daun juruk purutnya pas digigit wangiii banget!
the more the merry

Oiya, ini resepnya yang sudah diadaptasi aja ya ;)

Bangket Daun Jeruk
diadaptasi dari Majalah Sedap Sekejap

Bahan:

untuk santan:

3 lembar daun pandan
175 ml santan (dari 1/2 butir kelapa parut yang dicampur dengan 12-15 lembar daun suji dan air)

500 gram tepung kanji
2 lembar daun pandan
5 lembar daun jeruk purut -> aku pakai 6 lembar kecil
1 buah jeruk purut, ambil kulitnya -> aku nggak pakai, habis nggak ada sih
1/2 sendok teh garam
2 kuning telur
1 putih telur
200 gram gula halus

"ouch, my ear!"


Cara membuat:
- Blender daun suji yang sudah disobek-sobek dengan 100ml air hingga halus.
- Campur air suji ke parutan kelapa, aduk rata, peras, ambil santannya sebanyak 175ml atau lebihkan sedikit bila takut santan menyusut setelah mendidih nanti.
- Rebus santan, daun pandan, daun jeruk, kulit jeruk, dan garam sambil diaduk sampai mendidih. Angkat lalu saring dan dinginkan.
- Sangrai tepung kanji bersama daun pandan sampai daun pandan kering. Angkat dan dinginkan.
- Panaskan oven 140 derajat Celcius.
- Kocok telur dan gula sampai kental. Tambahkan tepung. Aduk rata lalu masukkan santan sedikit-sedikit sambil diaduk. Bila adonan sudah kalis (tidak lengket di tangan) tidak perlu mencampurkan semua santan.
- Giling adonan setebal 1 cm. Cetak lalu letakkan di loyang yang telah dioles margarin.
- Oven sampai matang, kurang lebih 40 menit.

..and a jar of it