Sunday, April 22, 2012
Semur Domba (Lamb Semur)
Semur is authentic Indonesian recipe. It's meat, with spices and most importantly, sweet soy sauce.
It's a Betawi(old name of Jakarta) very old recipe.
Like any recipe, ingredients and way of cooking sometimes depend on the cook. Even my grandmother and my mom cook Semur in slightly different way with slightly different spices. They were from Betawi origin.
So, my husband request to today's menu is Semur, made of of lamb. Semur are usually made of beef, but there are some from chicken too. Some I heard made of goat. But I never made it either from goat nor lamb.
So here it is, made as Ayah's request; using not so much soy sauce as it supposed to be. It's usually more dark, brown to black colour because use a lot of sweet soy sauce. But Ayah doesn't like too much soy sauce because it will be too sweet for him.
By the way, the shallots here in NZ are big. So I use only 4 cloves. But if you are in Indonesia, you can use 5 shallots.
Oh, one more thing, I will tell you a little secret later about a natural way in tenderizing meat, ok? ;)
Lamb Semur
Ingredients:
1kg lamb, diced
Sweet soy sauce
Salt
Water
Cooking oil
Fried shallots to spread
Spices:
5 shallots
2 cloves of garlic
5 candle nuts
2cm of ginger
2 lemon grass stalks
tsp white pepper
1/2 nutmeg
Directions:
- Grind shallots, garlic, candle nuts and ginger.
- Stir-fry the ground spices and lemon grass with enough oil (about 4-5 tablespoons)until you can smell nice fragrant from it
- Pour some sweet soy sauce.
- Stir in lamb until the colour changed.
- Pour in water, nutmeg, pepper and salt.
- Taste the salt, and you can add the sweet soy sauce to suit your taste.
- Cook until well done.
- Put them in a bowl. Spread the fried shallots on it. Serve.
Saturday, April 21, 2012
New Label: Natural colouring!
Hullooo hullooo!
I decided that to urge myself to be more active in this blog, I have to have a sort of project or challenge. You know, add a little ambition in blogging, eh eh eh.
So, I thought, I was quite success(I know, it's a little snob, sorry) to 'paint' some of my food to green with Suji leaves. Then, why not continue pursuing to get other colours from natural sources?
Do you think it's a good idea?
Okay, anyway.
I will keep this post updated every time I found new colour. I will also put the link on the side of my blog so anyone can check the list.
If anyone had heard or experience using natural colouring for foods, please share with me. I will embrace you with biiiiigggg HUG! ^^
Now, let's start:
GREEN:
• Suji leaves
Tried as:
- Cookies: Bangket Daun Jeruk
- Cakes: Pandan Sponge Cake, Cake Singkong
- Others: Lapis Beras Pandan Suji
RED:
• Beet root
Tried as:
- Soup: Tomato Soup
Isn't it FUN? ;)
I decided that to urge myself to be more active in this blog, I have to have a sort of project or challenge. You know, add a little ambition in blogging, eh eh eh.
So, I thought, I was quite success(I know, it's a little snob, sorry) to 'paint' some of my food to green with Suji leaves. Then, why not continue pursuing to get other colours from natural sources?
Do you think it's a good idea?
Okay, anyway.
I will keep this post updated every time I found new colour. I will also put the link on the side of my blog so anyone can check the list.
If anyone had heard or experience using natural colouring for foods, please share with me. I will embrace you with biiiiigggg HUG! ^^
Now, let's start:
GREEN:
• Suji leaves
Tried as:
- Cookies: Bangket Daun Jeruk
- Cakes: Pandan Sponge Cake, Cake Singkong
- Others: Lapis Beras Pandan Suji
RED:
• Beet root
Tried as:
- Soup: Tomato Soup
Isn't it FUN? ;)
Thursday, April 5, 2012
Risoles with Ragout Filling
Risoles Isi Ragout
Risoles or Risol is a common snack in Indonesia. In my country, this snack or fingerfood is so wellknown from long time ago, you can easily find it in many food stalls or even bakeries. It made out of rolled crepes(wrapper) and covered with breadcrumbs. The filling is become quite various nowadays. In the old times, I only know two fillings, ragout or stir-fried vegetables.
Ragout, I don't exactly know where this word came from. Could it be related to Ragout from French, or RagĂș from Italian? In Wikipedia it means meaty sauce. I don't know if this related or not, but Indonesia did get some influences from European country (especially Holland). The ragout we know is usually chicken or beef with vegetable with very thick clear or creamy sauce seasoned with pepper and nutmeg.
While the stir-fried vegetables filling is more Indonesian-ish. The filling is made by stirred shallot and garlic, added with vegetables like chopped string bean and carrot, and maybe chicken or beef, also sometimes a slice of hard-boiled egg.
Whatever the fillings, we-Indonesian, usually like it HOT! A sachet or a bottle of hot chilli sauce or fresh hot green chilli called cabe rawit are usually stand by the Risoles! Yumm-eeeee!
Ehm.
So I made the Risoles for the farewell share lunch at the kindy. The head teacher was moving to Sidney. Share lunch means every parent bring a plate of food. Any food will do. So I decided to make Risoles, food I had never made before.
The recipe is taken from a this blog. I made it almost the same as the recipe in that blog, but I use frozen mix vegetables for the filling to make it simple. As for the filling, hmm... I remember many snack sellers in Indonesia probably make ragout without milk or cream and with too many flour which resulting pudding-y filling, which I think..eeww! I just don't find it tasty.
I mean, wouldn't it be nicer to imagine that when you bite that crispy yet soft wrapper, a creamy sauce ready to flowing down in your mouth, rather than stick on your teeth? I imagine to have white sauce to be the Risoles' filling. So I made it, by cutting down the amount of flour from the original recipe. But the filling have to be able to scooped and put onto the crepes. If it too liquid, I might get trouble rolling the crepes because the filling can flood all over the place. So I just use about 5 tablespoon of flour and try to get the right consistency. To make sure, I put it in the fridge so I can scoop with spoon later. After it fried, it will be melt again. Unfortunately, I didn't really measure some ingredients.
Well, insyaAllah with this recipe you can't be so wrong, I think. Hehehe. Goodluck!
Risoles
Ragout:
2 pieces of boneless chicken(or more), boiled and cut to small cubes. Keep the boiled water as the broth.
200-300 ml of chicken broth (sorry I forgot how much exactly I pour, but it is around 200-300 ml)
500 gr carrots and string bean or any vegetables, cut to small cubes (I used frozen mix vegetables. Sorry for not really made it from scratch this time :( )
300 ml milk
5 tbsp flour
1 medium onion, chopped
½ tsp white pepper
a pinch of nutmeg
1 tbsp sugar
1 tsp salt
a slice of cheese (I didn't measure it, sorry :( )
Directions:
- In pan stir onion with a little oil until golden.
- Turn down the heat to low.
- Add in flour, stir quick and pour in the milk. Stir quick until the texture smooth.
- Add the chicken, vegetables, broth and cheese.
- Season with pepper, nutmeg, salt and sugar.
- Cook until the sauce is thicker.
- Put aside until completely cool.
- You may keep in the fridge and continue to make the Risoles the day after.
Crepes(wrapper):
100 gr flour
1 tsp salt
3 eggs
250 ml milk
1 tbsp butter, melted
a little more butter for the pan
Directions:
- Sieve the flour in a bowl with salt.
- Make a hole in the flour.
- Add the eggs inside the hole. Stir well with wire whisker.
- Gradually pour the milk and keep stirring until smooth.
- Add the melted butter and stirring until blend.
- Wrap the bowl with plastic wrap and let it sit for about 30 minutes.
- Heat a pancake pan (I use 12cm diameter pan) and smear with a little bit butter.
- Pour the crepes batter in the pan using a large spoon and tilt the pan to spread the batter evenly. You might want to choose the spoon that you think could make a thin crepe and use the same spoon all the time to make the evenly thick crepes.
- Cook about 2-3 minutes or until the surface of the crepe no longer wet/liquid.
- No need to flip to cook the other side of the crepe. Just put it on a plate, and continue to cook another crepe until finish.
- Set aside.
(makes about 25 crepes)
Dipping:
1-2 eggs, beaten
breadcrumbs
Making Risoles:
- Take one piece of crepe and put about 1-2 teaspoon of the filling and fold and roll like envelope or spring roll. Put aside the Risoles with the edge tucked underneath. Repeat until the crepes are finished.
- Dip each Risoles into beaten eggs then coat with breadcrumbs.
- Deep fry them with low heat until golden brown. Better keep an eye when frying, because it doesn't take long until they get brown. Set aside and use the tissue paper to absorb the oil.
Enjoy!
Thursday, March 1, 2012
Mud Cake

Hi!
I used to wonder what would be the different between what they called as Mud Cake with other chocolate cakes. So, to find out, I made this once about a couple months ago. I made it out of a recipe from Exclusively Food which I found through Google (my number one source of recipes), with several changes.
Fortunately, the cake could feed not just anyone in our house back in Tangerang, but I could also had chance to gave a half of the cake to my brother. His wife returned to me to say that she and her sister like the cake. They said it's delicious. Alhamdulillah. I promised her to give the recipe, but we were too busy preparing to move to NZ. It took quite long time, I had forgot what kind of changes I made in the recipe.
Yesterday, I try to make this Mud Cake again from the same source, and again, made some changes to suit my liking.
When I make some adjustment to a recipe I found, I usually change the using of sugar and/or the food additives. Well, sometimes I make changes simply because I didn't have the needed ingredients on hand. Of course, that made me NOT always successfully made it, ha ha!
This is dede, who was fallen asleep on the carpet,
but woke up again after I bribed him
with the pan that I used to melt chocolate-->
Oh, one more important thing to be concern when you make cake but prefer NOT to use any food additives as baking powder or baking soda is the method. Food additives give short cut in making cake. With help of food additives, some long methods sometimes are not important to do any more. Take muffin as example. You don't need to use electric mixer or too much of eggs to raise a cake. But if you intend to make food additives-free cakes, you have to go through the complete or right procedures.
The complete procedure for sponge cake type is to whisk the eggs and sugar until as fluffy as you can get. Then fold in dry ingredients(flour and friends) and wet ingredients(milk and friends) alternately in three batches. Yep, you have to do little bit more work.
The result of most of additive-free cakes may not be high-risen ones like any other cakes with additives. But if the taste just as lovely and delicious, why bother using any of it, right?
Anyway, let's back to muddy Mud Cake. I don't know why they name it Mud Cake. The texture is not slimey-gooey like mud. My Mud Cake is more like ground or wet sand. Is it wrong? I don't know. But I would not really care about it when I eat it, because it taste good. The cake texture is really-really dense. I think this could be an option for chocolate lover who's looking for the alternative of brownies.

cracky..

..crackilicious.
One more thing before you read through the recipe, I made what I think as a lighter ganache. Well, if using milk instead of cream can be called 'lighter', then it is lighter *grin*. I only use 150 gram of chocolate, because it was all I have left on hand *another grin*. The cake itself IS full of fat of course. It has butter, oil, chocolate and sugar in it. But I replace buttermilk with yoghurt and reduce the sugar. I hope it helps a liiiiiitle bit to lighter it. If you afraid the ganache will be too runny, you may start with 1/3 cup of milk, and add more if needed.
Soooo, if your heart is broken, your boss is being a jerk, the traffic makes you vomit, or any of bad day, just go home and make one of this. Forget how much fat in it 'coz you deserve it!
Mud Cake
Ingredients:
250g dark chocolate
200g butter (if using unsalted butter, add 1/4 teaspoon salt with the butter)
3/4 cup water
2 cups plus 2 tablespoons plain flour
1/4 cup plus 2 teaspoons cocoa powder
1 1/2 cups sugar
4 large eggs
2 tablespoons oil
1/2 cup yoghurt
Ganache, just melt everything above simmering water and stir to blend!
150g dark chocolate
1/2 cup milk
1 tablespoon salted butter
Directions::
- Preheat oven to 160 degrees Celsius.
- Line 20cm diameter round cake pan with non-stick baking paper. I use a springform pan for easy removal of the cake.
- Place 250g chocolate, butter, oil and water in a large saucepan over low heat, stirring occasionally until they melted. Add salt and water, stir until they blend. Remove mixture from heat and allow to cool to lukewarm/room temperature. Add yoghurt in and stir well.
- Sift the flour and cocoa powder together into a large bowl.
- Whisk eggs and sugar with electric mixer until fluffy and white.
- Fold flour mixture and chocolate mixure to the egg alternately in three batches with spatula until well combined.
- Pour mixture into prepared pan.
- Bake for about 40 minutes to 1 hour.
- Insert a thin-bladed knife or wooden skewer into the centre of the cake to test whether it is cooked through. If the knife/skewer comes out clean or with moist crumbs (not gooey batter) attached, the cake is ready.
- Remove cake from oven and allow to cool in the pan.- When the cake has cooled to room temperature, remove it from the pan.
- The top surface of the cake will probably have a crunchy crust, which you may wish to trim off. But I didn't.
- We turn the cake upside down to give a flat surface for icing.
- Then I just cut the cake into two. I use the bottom as the top to get flat surface on top.
- Spread the ganache on first piece of cake. Top it off with the other piece of cake. Don't stop. Just spread all over the surface with ganache until all covered up.
- Let it cool. You may put it in the fridge for faster result.
- After the ganache hardened, you can cut it with knife and enjoy.
Saturday, February 25, 2012
No-Knead Dinner Rolls

My very first bread!
Yay!
Alhamdulillah!
I always thought that making any kind of bread is high risk baking and complicated. All I know that bread need time, kneading, and probably a lot of luck! That's why I never try to make any. I skipped the bread recipes when I read or browse. But, it's been so long that I was eyeing on several no-knead bread recipes. I wondered, are they that easy?
Later, we are now finally moving to Auckland. We have been here for almost two months. I have to gather my guts to drive again. So I drive again, so far only to pick and drop my sons to kindy.
I'm still not so confident to drive too far, other than to the kindy. So, it makes me unable to go to grocery stores by myself. I have to wait for weekend so my hubby can drive me to go shopping. But, you know, sometimes some of the food run out before the weekend comes. Stuffs like bread is gone fast, or meet their expiry date before weekends.
I realize now, that my responsibility, not just about the food, raise so high. I have to stop from my daydreaming, slap my face and work on it!
So I finally try this recipe, after browsing for the most eeeeeasiest and shortest time it could get. I found this, from Sweet & Saucy blog. I never explore this blog before, but now I interested to go 'deeper':)
So after making shortbread yesterday, today I made real bread. After I did my Subuh pray, I started by staring the recipe I was about to make. Mix, mix mix, and I let the dough sit for an hour inside the cabinet under the stove to keep it warm.
It is sooooo nice to see it doubled in size. Looked very promising! After that I make 16 rolls, let sit for half hours.
the rolls before raising up againI cover the rolls with towel since I don't have the plastic wrap.
The rolls looked bumping tight shoulder to shoulder. 
After they got into the oven, it looked more stuffed and tight between them.
I love watching those little fat rolls.
The smells of bread in the oven is warming the house. My heart melt. My bread, my very first bread. Not bad at all for my first time bread making.The only bad thing that I have done is I think 25 minutes is a bit too long for my oven. So the 'skin'of the bread is a little harder that I expected. If you want to try this recipe, you might want to start with 15-20 minutes. If you think it is not enough, you can add 5 more minutes and see what happen.
Anyway, enough 'talking'. Here, have a bread!
No-Knead Dinner Rolls
Ingredients:
1 cup warm water
1 tablespoon active dry yeast
2 tablespoons of sugar
2 tablespoons of melted butter
1 large egg (lightly beaten)
3/4 teaspoon of salt
3 cups of bread flour (spooned and leveled)
Directions:
- Put warm water in a large bowl and sprinkled it with one tablespoon of active dry yeast and let the mixture stand until it was foamy (about 5 minutes). --> I don't think mine was foaming (I don't call it foaming, just blending).
- Add sugar, melted butter, egg, and salt to the yeast-water mixture, whisking to combine.
- Add flour, stirring with a wooden spoon until everything is incorporated and a sticky dough has formed.
- Using a brush, brush the top of the dough with more melted butter, cover the bowl with clean kitchen towel, and set it aside until the dough has doubled in bulk (about 1 hour).
- After an hour, turn the dough out onto well-floured chopping board.
- With floured hands, roll the dough into a thick log and cut it into 16 equal pieces.
- Smear a 23x23cm pan with melted butter.
- By hands, fold the edges of each piece towards the center, pressing to secure, until a smooth ball formed.
- Put the dough balls in the prepared baking pan (smooth side up), cover the pan loosely with kitchen towel, and let them rise in a warm place until doubled in bulk (about 30 minutes).
- After the rolls has risen adequately, remove towel from the pan and bake them at 205C for 15 minutes first (and add few minutes more if necessary).
- Take them out of the oven.
Makes 16 rolls.
Friday, February 24, 2012
Oatmeal Shortbread

Small batch.
Small batch is good to test out a recipe. This one is simply easy and the result is a small batch of buttery and crunchy-inside shortbreads. It is good enough for hungry toddlers between their meal time. The sugar used is low, so for you sweet-tooth people, these might not suits your taste so much.
I got the recipe from here.
I just made a little adjustment, so you might want to compare with it's original recipe. I made the boys helped me out making it. They just dumped the ingredients into the bowl. I thought the batter could be cut with cookie cutter. But, apparently I didn't think it's firm enough for it and instead it is good enough to be flatten in the tin and cut out after bake.
So here is the recipe, my way ;)

Oatmeal Shortbread
Ingredients:
1 cup flour
3 tablespoons sugar
120 gr unsalted butter
1/3 cup quick-cooking oats
a little salt
Directions:
- Heat up the oven 165 celcius.
- Toss the heck all of ingredients into the bowl. Process it by cutting with two butter knife until mixture resembles fine crumbs.
- Mould the batter into a ball.
- Lined a tin with baking paper. I use about 23x23cm tin.
- Put the batter onto the tin. Use your finger and hand to press the batter to cover the tin's base.
- Use the butter knife to make a cutting trace on the batter'surface. If you want to cut it deep until the butter knife reach the tin's base, it's alright too.
- Bake the shortbread for about 20-30 minutes.
- Take the tin out and immediately cut the cookies carefully following the traces that you have been made in advance.
- Let it cool.
- Take the cookies out the tin. Enjoy!
Wednesday, September 28, 2011
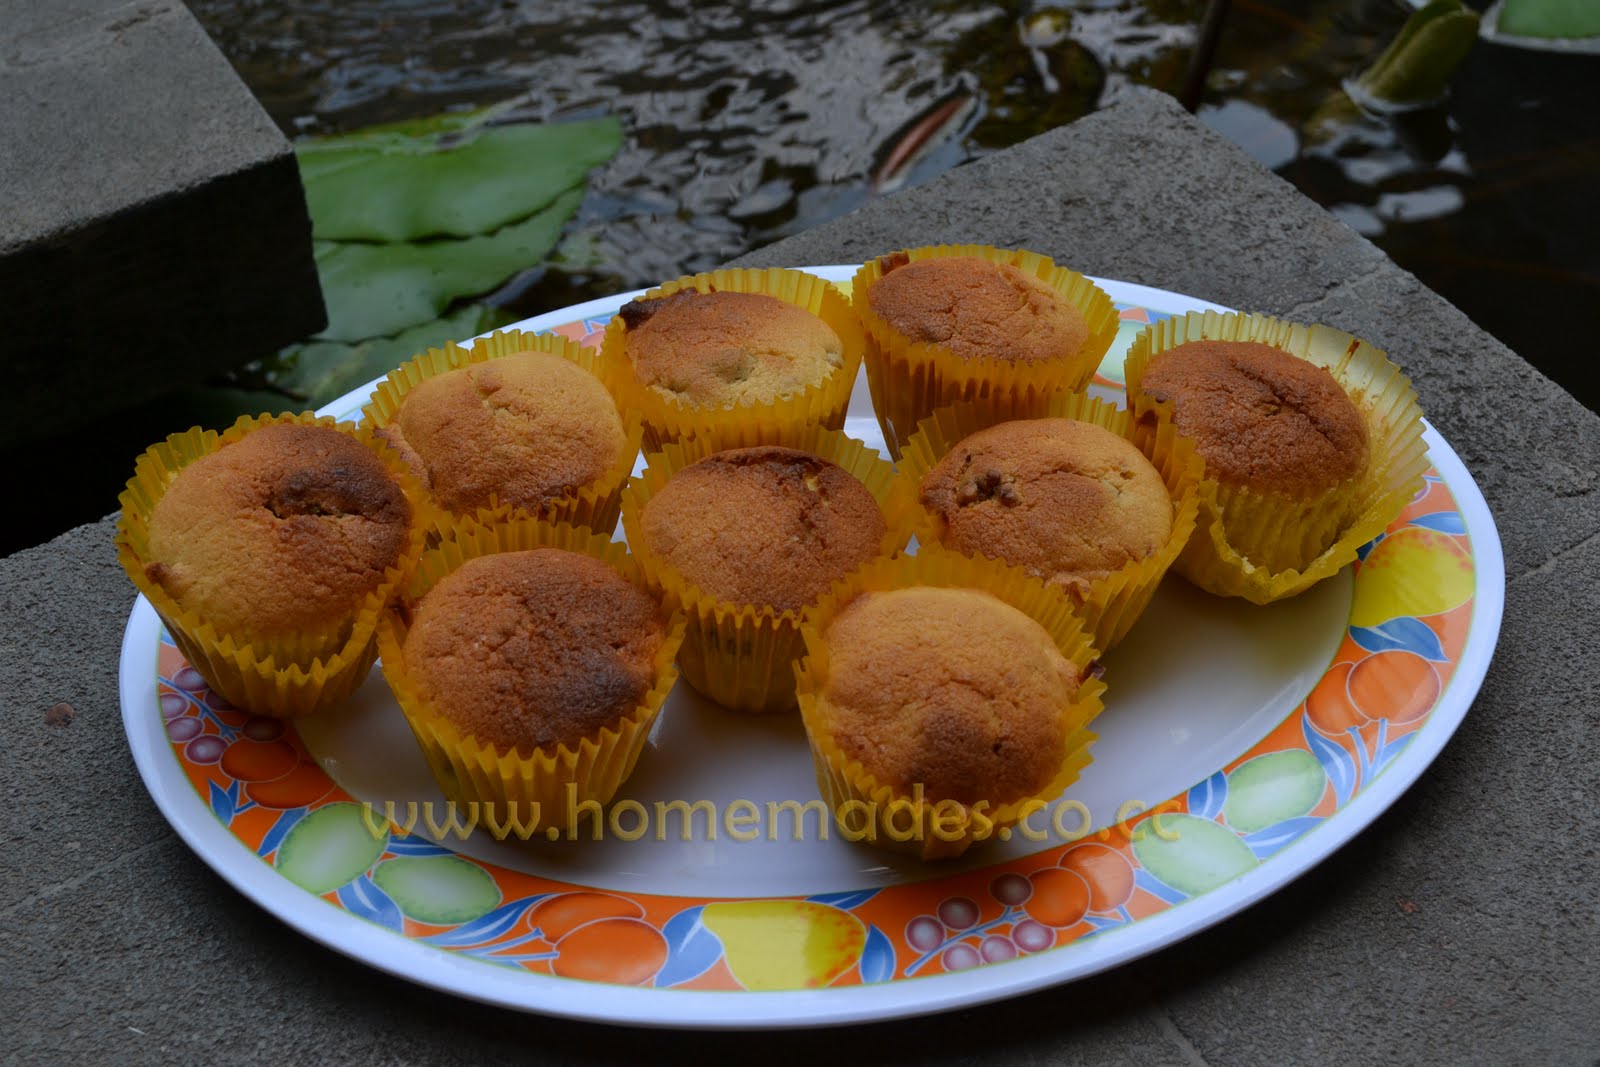
Ananas Cupcake

I had leftover homemade pineapple jam after last Idul Fitri. Homemade? Did I make it myself? No. Someone made it at her home and I just bought it, hehe! I made Nastaart (pineapple jam filled cookies) with it for the Eid day.
So yesterday, buttercake is the one thing I thought I could make it easy and quick. I remember the jam in the fridge, with previous recipe, voila: cupcake-shaped-nastaart!
The blend of butter and pineapple jam is sweeeet! The butter and yogurt made the cake easily melt in the mouth.
The filling is easy, because the homemade jam is very thick like paste so I can mold into small balls with my hand, then mix them in the batter with spatula.
So quick, so yummy.
Ananas Cupcake
Ingredients:
1 1/4 cup flour
150 gr butter
2/3 cup sugar
2 eggs
125 gr yogurt
1 tbsp homemade thick pineapple jam
More thick homemade pineapple jam, about probably 50-100 grams. it's really up to you ;)
Direcions:
- Preheat oven on 180C
- Line cupcake tins with liners.
- Beat margarine and sugar with electric mixer til the color turn to pale.
- Mix in eggs, one by one until quite fluffy-er.
- Mix in 1 tablespoon of pineapple jam, mix just to spread.
- Mix flour and yogurt in with spatula, alternating each.
Now, there are 2 ways:
1. Good way: pour in with spoon the batter in the liner, then fill in with jam, then cover it with batter.
2. My way: pinch the jam into small balls, and throw them into the batter. mix with spatula to spread them. Than, pour in the batter into the liner, make sure each liner has at least one ball ;)
- Bake for about 20-30 minutes or until it passed the poking test.
- Get it out of the oven. Eat!
Oops, sorry I bite it :p
Subscribe to:
Posts (Atom)